Luz: Shadertoy Plugin

Introduction

Shadertoy.com is an online community and tool for creating and sharing shaders through WebGL, used for both learning and teaching 3D computer graphics in a web browser.

The approach in Shadertoy is to produce images with minimal data input to the graphics pipeline where most of the heavy lifting is performed directly in the fragment shader. The vertex shader in this case is only used to process a full-screen quad which functions as the canvas for these visual effects. This is not always the most ideal way of doing 3D-programming but if you want to play around with a lot of math and get creative, you’ve come to the right place.

In this post, I summarize the discoveries I’ve made along the way and updates to Luz that were necessary to implement Shadertoy support.

Plugin Demo

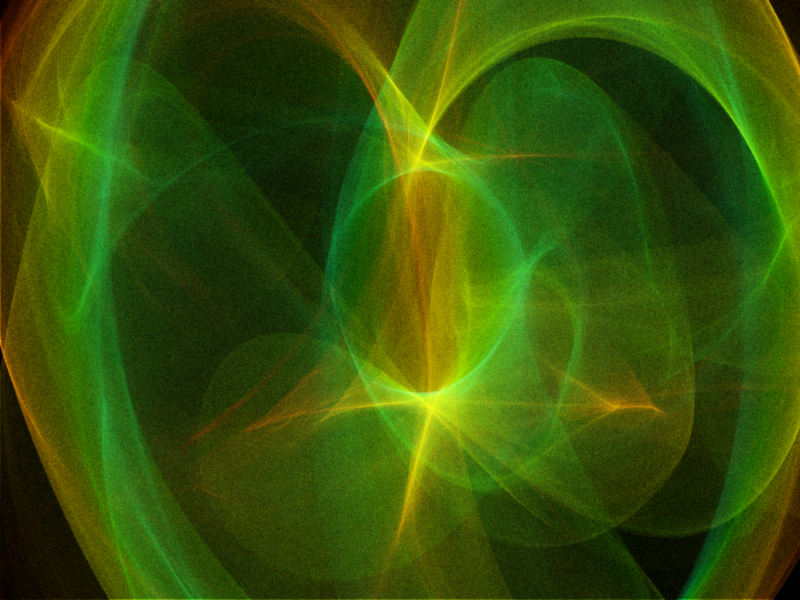
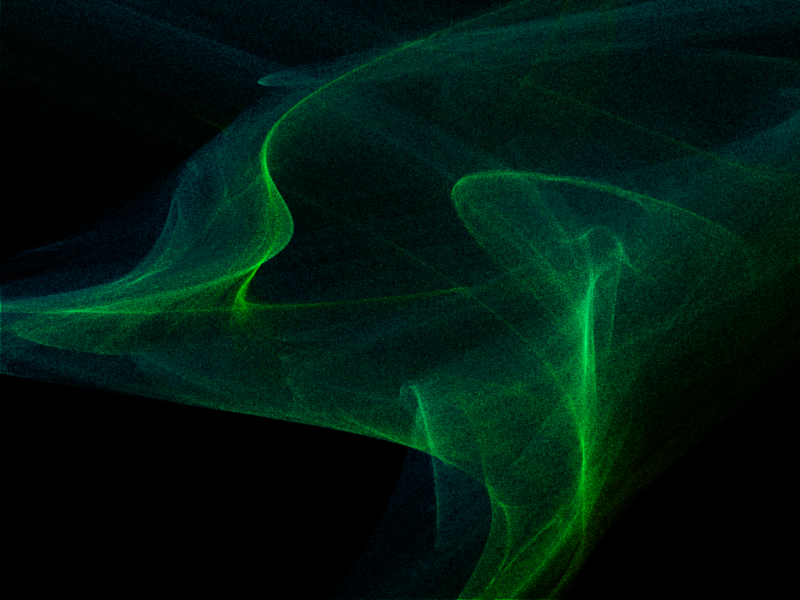
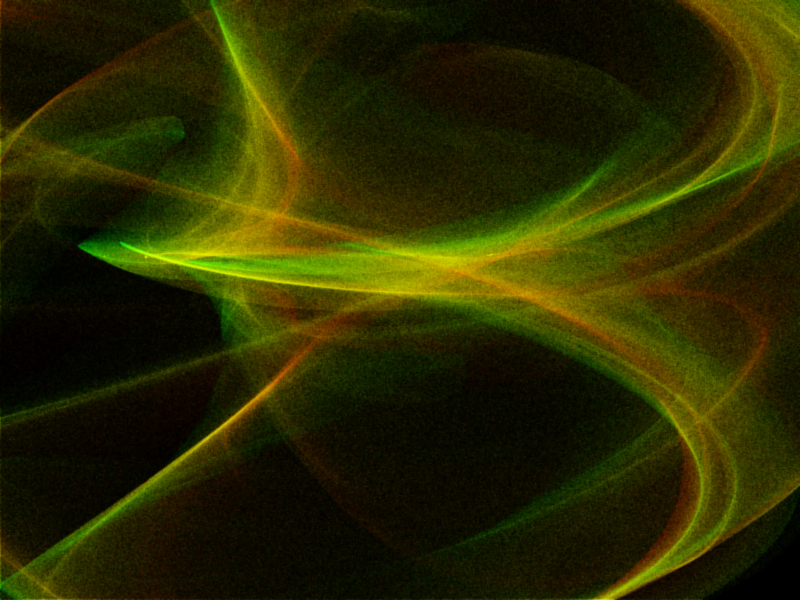
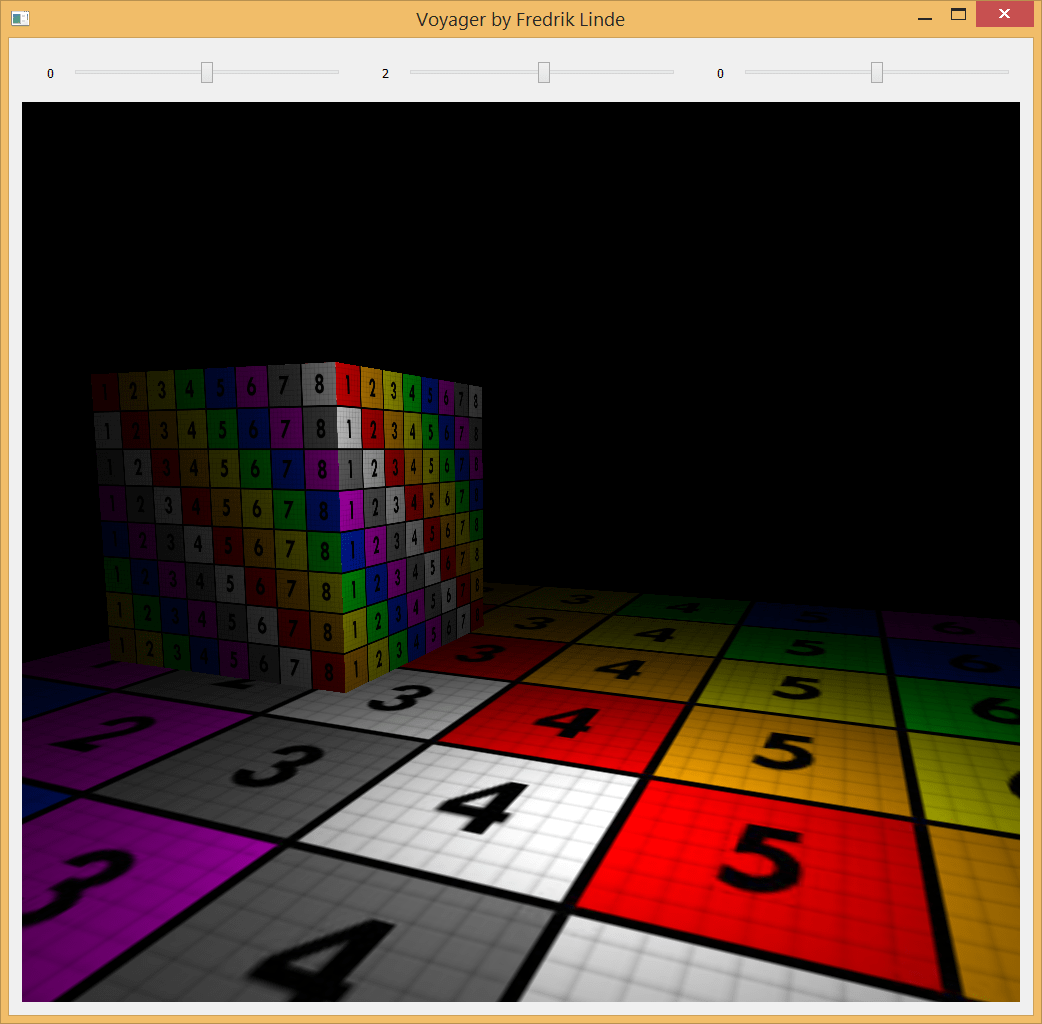
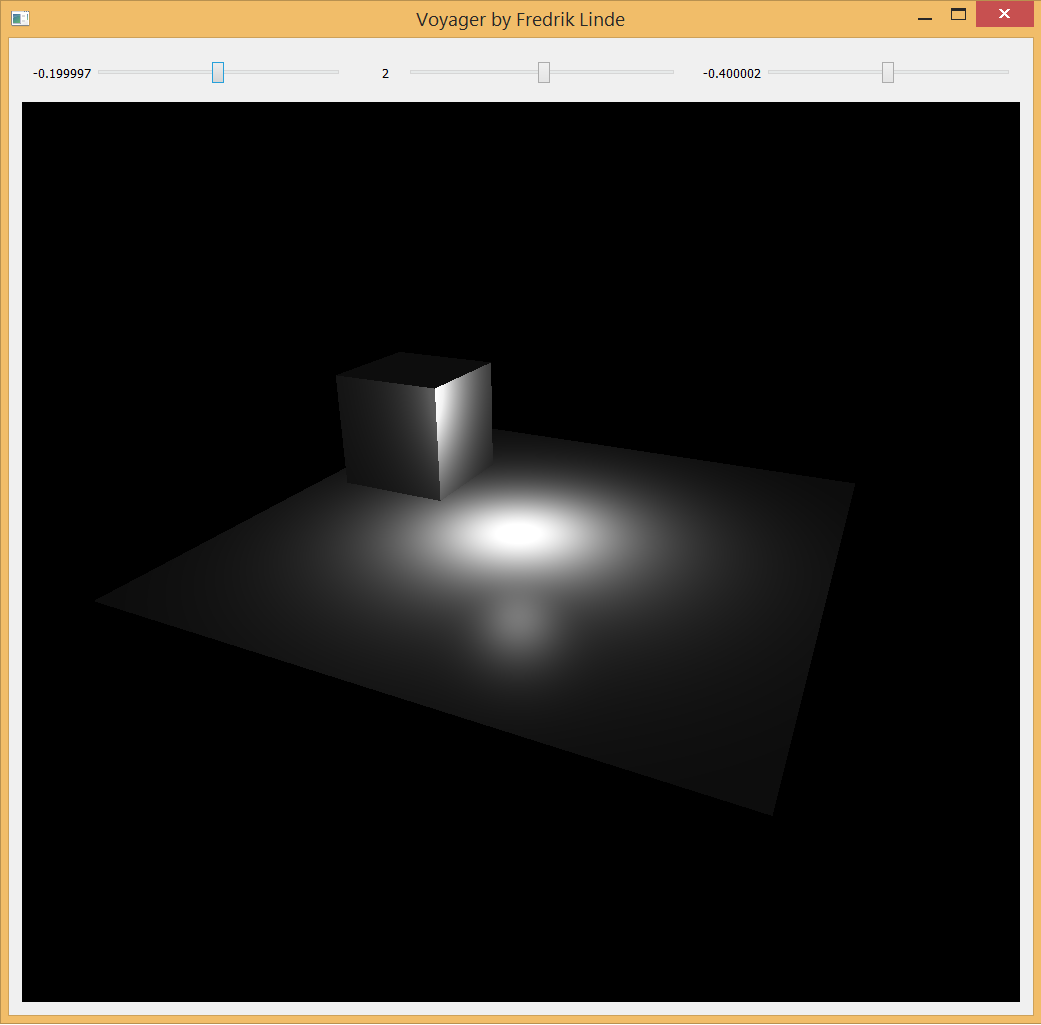
Here is a demo with a couple of shaders from Shadertoy that this plugin can interpret and render using Luz. They are all listed below in order, all rights belong to their respective owners:

As you can see, many shaders written for Shadertoy features input support and this data had not yet been forwarded to previous plugins. Alongside with mouse position updates, input callbacks within Luz are now also forwarded to the plugins. This enables us to create interactive turntable cameras or move the position of the camera.

Plugin Dependencies Localization

If you have a DLL that links to dependencies from the same folder, such as other dynamic link libraries, then it’s necessary to add that DLL directory before attempting to call LoadLibrary. Otherwise you will be given the error code 126 from GetLastError, which translates to ERROR_MOD_NOT_FOUND. This could be somewhat misleading at first if your targeted DLL file does exist at the specified location, but it’s in fact the dependency of the plugin that cannot be found.

const size_t pos = path.find_last_of("\\");
SetDllDirectory(path.substr(0, pos).c_str());

pluginHinstance = ::LoadLibrary(path.c_str());

This is an easy mistake to make and I was naive to think that LoadLibrary would be able to resolve this on its own by looking in the same folder the DLL was loaded from. I found the following statement from the official documentation which gave me a better understanding of the issue:

If a DLL has dependencies, the system searches for the dependent DLLs as if they were loaded with just their module names. This is true even if the first DLL was loaded by specifying a full path.

Hence, this is why we need to make the call to SetDllDirectory.

OpenGL Compensations

Unlike Vulkan where headless rendering is possible, OpenGL requires a window to create the context. It’s not really a problem since we can specify to GLFW to create the window as hidden so we will never be able to interact with it. Once we have set it up, we only need the window to swap buffers between render calls.

glfwWindowHint(GLFW_VISIBLE, GLFW_FALSE);
window = glfwCreateWindow(width, height, title, monitor, NULL);

Since OpenGL also defines bottom left corner of the screen as (0, 0) unlike in other API:s where (0,0) is located in the upper left corner of the screen, I felt the need to provide a way to compensate for this without tying myself up to any API conventions. Luckily, ImGui::Image lets me provide the coordinates for the corners of the image and I decided to let the user define what positions the corners should be. This means we can render an image as usual regardless of the convention used by the underlying API in the plugin and then Luz compensates it for final presentation.
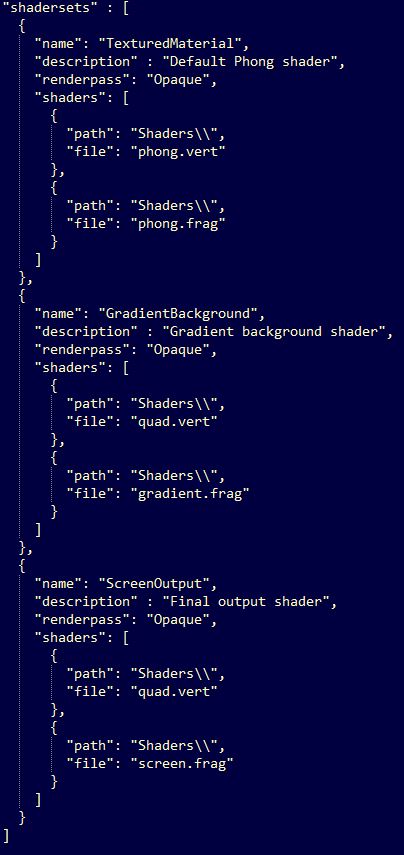
  "Framebuffer": {
	"UV0": {"x": 0.0, "y": 1.0 },
	"UV1": {"x": 1.0, "y": 0.0 }
  },

Execution Warnings

Before I started writing the Shadertoy plugin, Luz had no concept of criticality levels in terms of return values from the various stages of execution. If something failed in the plugin, Luz would unload the plugin and return the latest error message.

In this case when you’re reloading shaders on the fly, it’s only a matter of time before you slip and accidentally write some invalid syntax (it’s kind of the whole point to allow for experimentation). Just because a shader could not be compiled, I don’t want Luz to unload the plugin but rather just print the latest error message and keep the plugin active. So it was about time that I introduced some criticality levels:

  • Success: Everything executed as expected and the plugin continues to feed Luz with image data.
  • Warning: Something of concern was detected during execution and requires the user’s attention. Plugin will continue to execute without the guarantee of correct image presentation or optimal performance.
  • Failure: A critical error was detected and the plugin cannot execute properly until it has been fixed.

While the criticality levels themselves don’t always guarantee proper error handling, it can be a guiding tool for troubleshooting along with the messages recorded in the log. Below is an example of how the color coding looks like in the log:

Future Work

In order to reach full compatibility with Shadertoy, my plugin will have to increase its number of iChannel uniforms to a total of four. They are currently only interpreted as sampler2D uniforms but since I’m looking to support cube maps as well, I will work on adding samplerCube uniforms for the next version. Another concept in Shadertoy that I haven’t implemented yet are buffer stages which can serve as input into any of the four iChannel slots to allow for more advanced and longer chains of computations.

Luz: Clifford Attractors Plugin

Introduction

Clifford A. Pickover received his Ph.D. from Yale University and is the author of over 30 books on such topics as computers and creativity

Today I’ve been diving into the works of Clifford A. Pickover after reading some of his early books on computer graphics when I stumbled over the Clifford Attractor on Paul Bourke’s homepage.

These chaotic attractors can produce stunning visualizations and with example code provided by Paul Richards, I was able to write a plugin for Luz that could render them in real-time. Paul Bourke goes into more detail further down in the page about how these color effects are achieved:

The main thing happening here is that I don’t draw the attractor to the final image. Rather I create a large grid of 32 bit (int or float) and instead of drawing into that in colour I evaluate points on the attractor and just increment each cell of the grid if the attractor passes through it.

So it’s essentially a 2D histogram for occupancy. One wants to evaluate the attractor much more/longer than normal in order to create a reasonable dynamic range and ultimately smooth colour gradients. I then save this 2D grid, the process of applying smooth colour gradients comes as a secondary process … better than trying to encode the right colour during the generation process. One can even just save the grid as a 16 or 32 bit raw, open in PhotoShop and apply custom gradient maps there.

Of course this is “just” a density mapping of the histogram and doesn’t immediately allow for colouring based upon other attributes of the attractor path, such as curvature. But such attributes can be encoded into the histogram encoding, for example the amount added to a cell being a function of curvature.

Plugin Demo

Alongside playing around with the Clifford Attractor, I’ve added a couple of minor features to Luz:

  • A grid for the viewport to replace the grey default background
  • Replaced performance overlay with a dedicated performance graph to record render times
  • The option to save the currently rendered image from the viewport to disk
  • Frame buffer label overlay on the rendered image

Here is a presentation of the Clifford Attractors I rendered during my session, they are somewhat grainy but the result is nevertheless pleasing to look at.

Until next time, have a good weekend!

Luz: Plugin Architecture Update

Back again with another update on my experimental renderer Luz, which I’ve made some drastic changes to over the last couple of months. This change in design came from the idea of turning Luz into a stand-alone viewport application in which plugins can be loaded to write to the Luz viewport using various CPU or GPU based rendering approaches.

Plugin Demo: Vulkan Triangles

Here is a showcase of the first successfully developed plugin using Vulkan for Luz. When it comes to prototyping, it’s back to the holy triangle. Nothing more, nothing less.

Instead of focusing on raytracing, Luz now supports a wide range of plugins to be developed that can be viewed and analyzed within its viewport. Plugins are loaded into Luz at runtime and can draw into the framebuffer allocated by Luz. With this “black box” approach for viewing the final image of a render call, window handling can be reused across different plugins and the developer (me) can fully focus on developing the 3D-techniques without having to reinvent the wheel by making new window handling systems for each project.

Plugin Architecture

A plugin is a dynamic-link library underneath the surface and to make this work in practice, both Luz and the plugin shares the same interface. Only two functions are necessary at the moment for the plugin model: “GetInterface” and “FreeInterface”. Since plugins might have different usages, I’ve allowed for there to be different interfaces in case the standard protocol lacks the necessary flexibility.


#ifndef TRIANGLES_INTERFACE_H
#define TRIANGLES_INTERFACE_H

#include "Interfaces/VulkanPluginInterface.h"

extern "C" 
{
    bool GetPluginInterface(VulkanPluginInterface** pInterface);
    typedef bool(*GETINTERFACE)(VulkanPluginInterface** pInterface);

    bool FreePluginInterface(VulkanPluginInterface** pInterface);
    typedef bool(*FREEINTERFACE)(VulkanPluginInterface** pInterface);
}

#endif

One important detail to mention here is that both the plugin and Luz needs to use the same CRT in order to share the same heap, in case they require knowledge of allocated resources on each side of the boundary. If they don’t match, you can end up having some heap validation errors that don’t make a whole lot of sense, simply because the addresses acquired won’t match. Another rule I have enforced is that neither the plugin or the application allocates dynamic memory within each others domain. Once the interface has been established between the plugin and Luz, we can access the following functions below:


#ifndef PLUGIN_INTERFACES_I_VULKAN_PLUGIN_H
#define PLUGIN_INTERFACES_I_VULKAN_PLUGIN_H

struct VulkanPluginInterface
{
	virtual bool initialize() = 0;
	virtual bool release() = 0;
	virtual bool execute() = 0;
	virtual bool reset() = 0;

	virtual bool getImageData(void* pBuffer, const unsigned int width, const unsigned int height) = 0;

	virtual bool sendData(const char* label, void* data) = 0;

	virtual float getLastRenderTime() = 0;
	
	virtual const char* getLastErrorMsg() = 0;

	virtual const char* getPluginName() = 0;
};

#endif

User Interface

Each plugin is also accompanied by a JSON based .ui file where UI elements can be specified. Input fields, scalars, checkboxes, headers and many more ImGui elements can be specified here to customize the controls exposed by the plugin to modify its behavior. Each interaction with the UI elements in Luz is then sent back to the plugin using events and these are mapped against the contents of the .ui file so the plugin will always knows which UI elements received updates.

{
  "Document" : {
    "Description" : "Vulkan Plugin Configuration"
  },
  "Framebuffer": {
	"Resolutions": "800x600,1024x768",
	"Modes": "Interactive",
	"Hardware": "GPU",
	"Methods": "Copy",
	"SupportMultithreading": true,
	"DataFormat": "Byte"
  },
  "Menu" : {
	"Elements": [
	  { "Type": "BeginHeader", "Title": "Pipeline" },
		{ "Type": "FloatScalar", "Title": "Rotation Factor" },
	    { "Type": "Tick", "Title": "Backface Culling", "Reset": true },
	    { "Type": "Dropdown", "Title": "Polygon Mode", "Args": "Fill,Line", "Reset": true },
	  { "Type": "EndHeader" }
	]
  }
}

Hope you’ve enjoyed this demo, I’ll be back again in the near future with more demos and features added to Luz 🙂

Voyager Engine Update No.5

Back again with another update!

The shader reloader now supports time related buffers which enables me to animate textures and gradients on the fly in my shaders! In order to test it, I recreated the shader code from ShaderToy demonstrating Inigo Quilez palettes using Voyager: https://www.shadertoy.com/view/ll2GD3

Here is the original article from Inigo explaining the palettes which the shader code is based on: https://iquilezles.org/www/articles/palettes/palettes.htm

I’m slowly becoming able to create more advanced shaders now that I have access to updated resolution and timestamp values from the Voyager engine. Next up on the horizon is to continue to stabilize the functionality I have today and make some necessary refactoring and cleanup. Hopefully I will be able to continue on improving the configuration settings making it easier for shader developers to set up their render passes and custom shader pipelines.

See you next time 🙂

Voyager Engine Update No.4

Quick little update this evening! Added support for off-screen rendering in Voyager which enables me to edit the final image composed by all previous render passes, such as adding a “twirl” effect for example.

I was also able to reuse the quad shader for the final render pass with my “Shaderset” configuration, enabling the user to configure their own shader pipelines. Shadersets specifies an array of shaders and attributes for a pipeline where shader types are based on their extension.

set

Voyager Engine Update No.3

Well, it’s that time again. Nothing too fancy, just some fun hobby work I’ve been doing lately on my 3D rendering framework which goes by the working name “Voyager”. In this update, I’m trying it out by making this model viewer application. Can you guess which game this little bugger is from?

I’ve mostly been working on integrating the “Shader Reloader” I created last year into Voyager and the most recent feature I added was the support for wireframe shading. Instead of using geometry shaders which is the common approach, I sent barycentric coordinates as an extra attribute for each vertex and used edge detection by checking the fragment distance against the triangle coordinates with interpolation, essentially a similar approach as in a traditional ray/triangle intersection test.

barycentric-coordinates
Image courtesy of “Catlike Coding”

Although it’s cheaper, I have to think more about screen resolution and how I adapt the line thickness according to the camera distance (which looks awful by the way now at far distances and that’s why I’m not showing it…*nervous laughter*).

Anyway, having the shader reloading functionality implemented makes it so much easier to develop shaders as I’m saving plenty of time not having to recompile at every new startup of the model viewer application. The engine only supports an OpenGL render backend at the moment but I’ve established a high-level API agnostic interface which hopefully will help me implement DirectX backends in the future without too much pain. In the meantime while the interface grows, I’m focusing on more engine features and functionality that I want for creating effects and handling 3D-models.

(For the trained eye, please don’t kill me for the wireframe branch by the end of the shader, I will improve that check)

Voyager Engine Update No.2

The next milestone for the shader reloader has been reached – today I was able to change simple shader code such as fragment color output while still keeping the application running.

The file notifier now publishes messages that any subscribers can pick up. Once a shader file is updated, the shader manager unpacks the message containing the information of the modified shader. If it is already present in the shader manager, it recompiles the shader and relink the active program. I have also taken inspiration from nlguillemot‘s implementation where the shader is identified using its file extension. Instead of naming it .glsl, it can be named .vert or .frag and then we automatically interpret its type when reading from disk.

Next up is more error handling, I would love to squeeze in more detailed output in the terminal. I still have SPIR-V compiled shader code as the final destination for this prototype, but first I’m going to tackle the next big problem which is managing uniforms between shader changes. Essentially, all I’m interested in is the main shader code and not the preamble. I could generate it on the fly given what OpenGL version the user wants to use (once again inspired by nlguillemot) and add it to the shader string when reading from disk. That way, I won’t have to rely on the targeted shader version…although it should be a detail to keep in mind, some shaders are probably targeted for a specific version with good reasons. I should do more research on this topic but for now, this is going pretty alright.

Until next time, have a good one 🙂

Voyager Engine Update No.1

It took me a while to get started again after my long summer vacation, but now I am back at it again. I have spent the majority of September to learn more about OpenGL with my Voyager project and while it is not really anything impressive so far, I feel like the structure is better than any of my previous projects.

I created a geometry factory class to create all the geometries, which will later help me with loaded vertex data from other file formats. I also created a small renderer for OpenGL rendering – no hardcoded OpenGL vertex data setup. You load the geometry and put it in a renderable, then the renderer takes care of the rest.  I am now primarily working on setting up more wrappers for OpenGL, preparing a debug shader to render surface normals and creating an obj loader.

voyager_color

Last night was mostly focused on creating a default phong shader with light attenuation and as you can see, it is working quite decently. I read Light attenuation | I’m doing it wrong and highly recommend it if you have not read it already or are familiar with it. This post certainly helped me to understand the linear and quadric attenuation factors better, plus opening up my eyes on how much they are actually related to the physical world. Also, it is fully possible to plot it with Desmos as you read through it.

voyager_light

Qt also helps me a lot with window management and I am probably going to use it as the primary window management library throughout the project. For now I am just using sliders to adjust my one and only point light. I will give it some more friends later, I promise.

Check out my repository on Github and leave a comment if you have any thoughts. Feedback is also greatly appreciated 🙂

Morph Animation Demo

This is a presentation of a Morph Animation technique based on the GPU approach described in ShaderX3: Advanced Rendering with Directx and OpenGL section 1.4. Me and a friend of mine implemented this as a summer practice, but that solution was entirely based on the CPU with a dynamic vertex buffer.

While this works, it’s much faster and requires less computational power to go with the GPU approach that binds the target and source vertex buffers to the same input layout. That way, the interpolation can be done entirely in the vertex shader.