On my on-going project in creating a tattoo concept for a friend of mine based on design from the game Destiny, I was asked how my workflow in Blender looks like. Fortunately, this time around I had decided to record my sessions and could piece together a summary of all the steps I’ve done up till this point. 3D-modelling is probably one of the funniest things I know to work with on my spare time so it would maybe be fun sharing not only the results but also the journey there.
I’ve also included some captions explaining a bit more about each step as I don’t feel it would be rather exciting hearing me ramble on about each and every decision I make in the process. I hope you enjoy it, I’m continuing on the rendering and finalizing this concept at the moment.
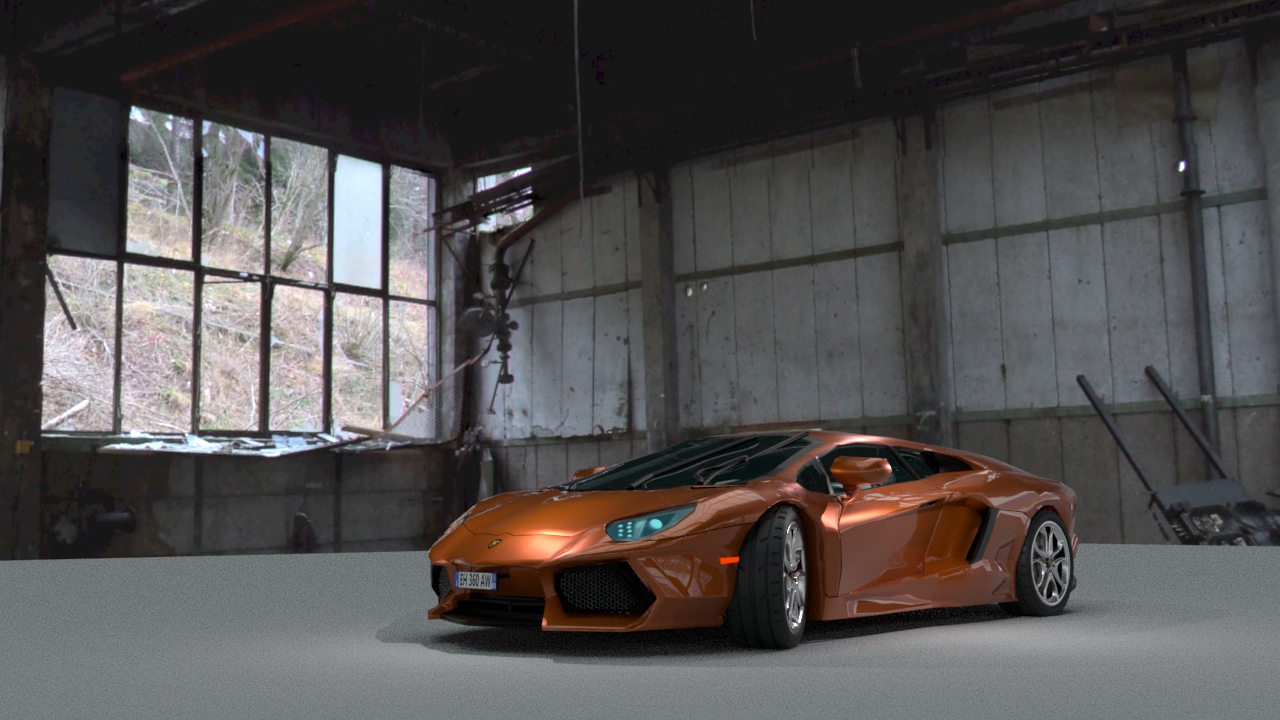
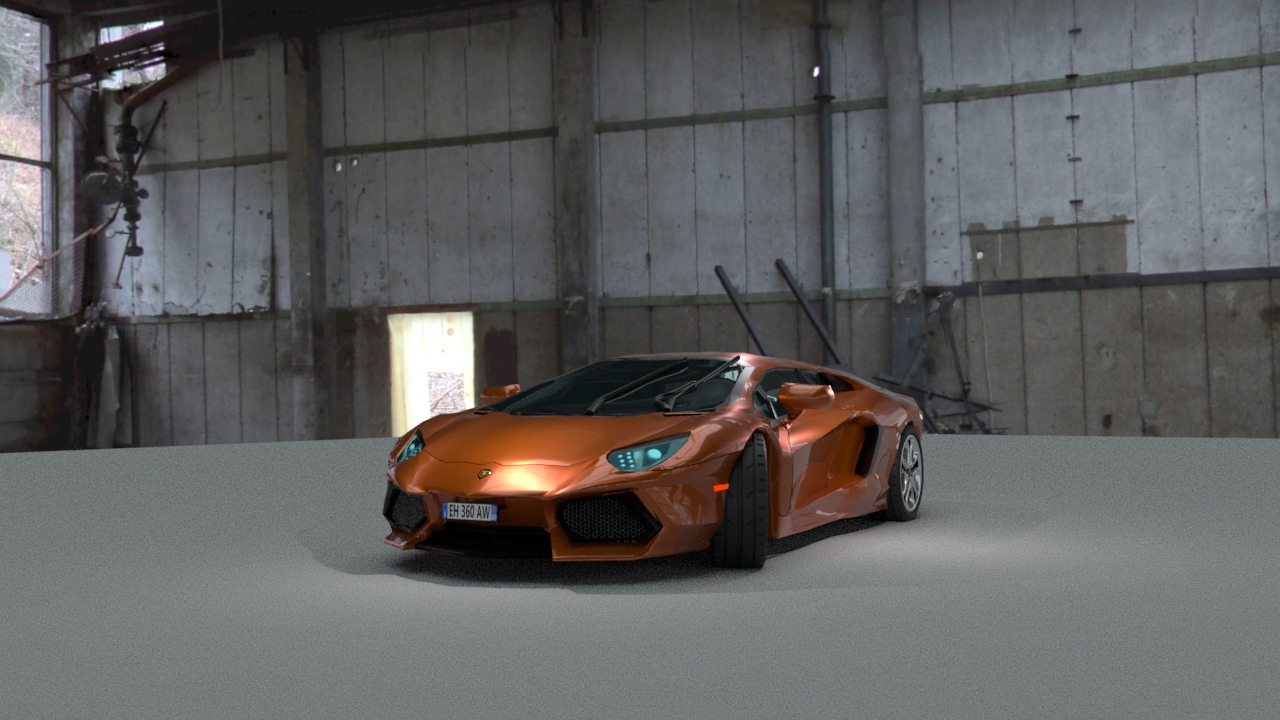
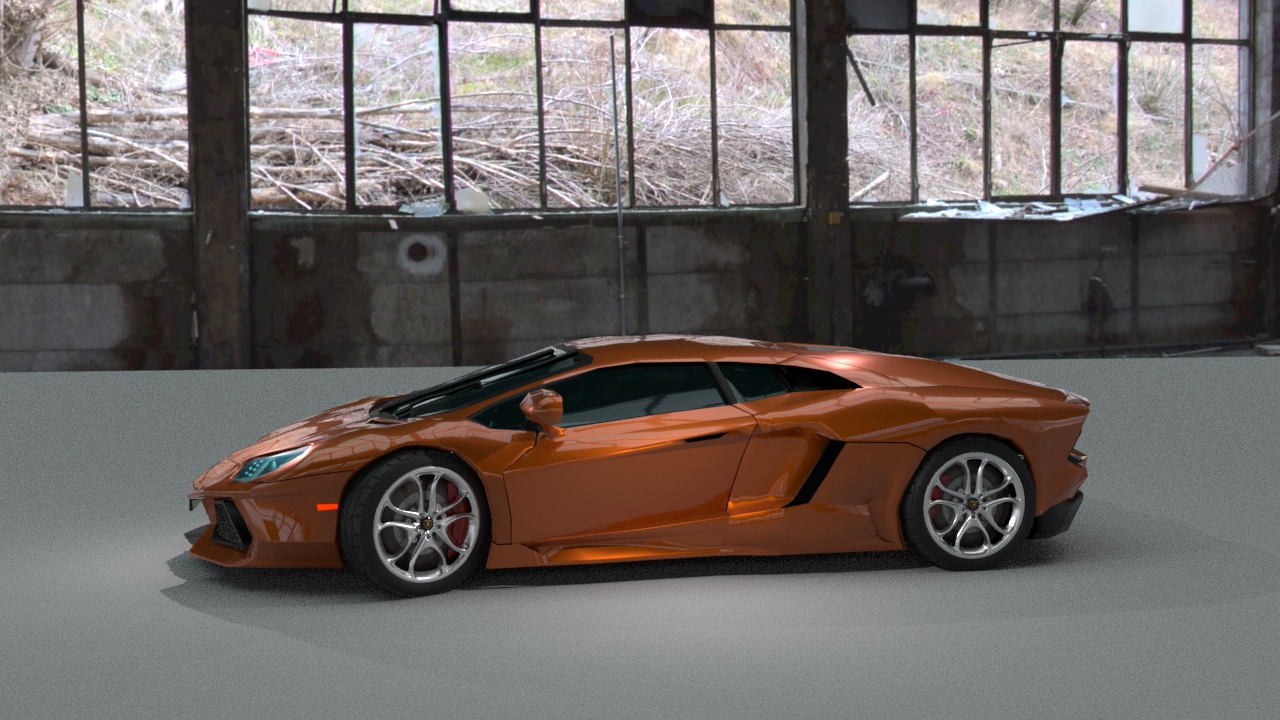
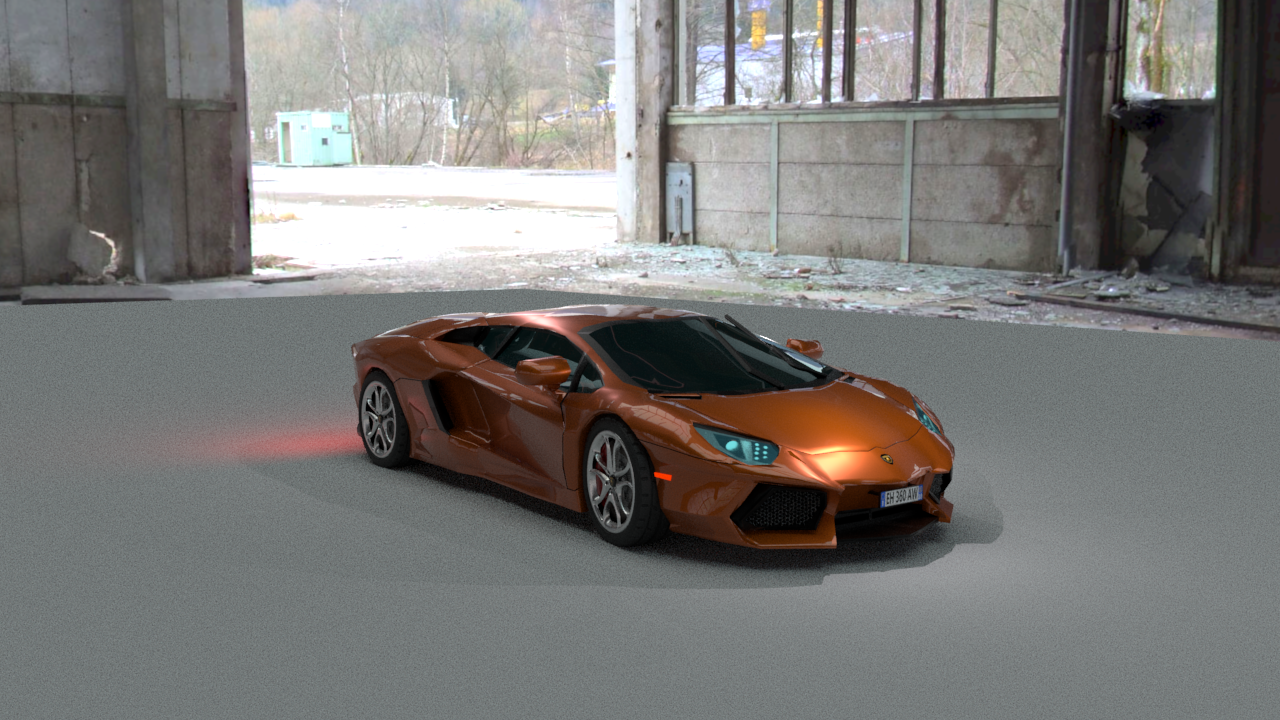
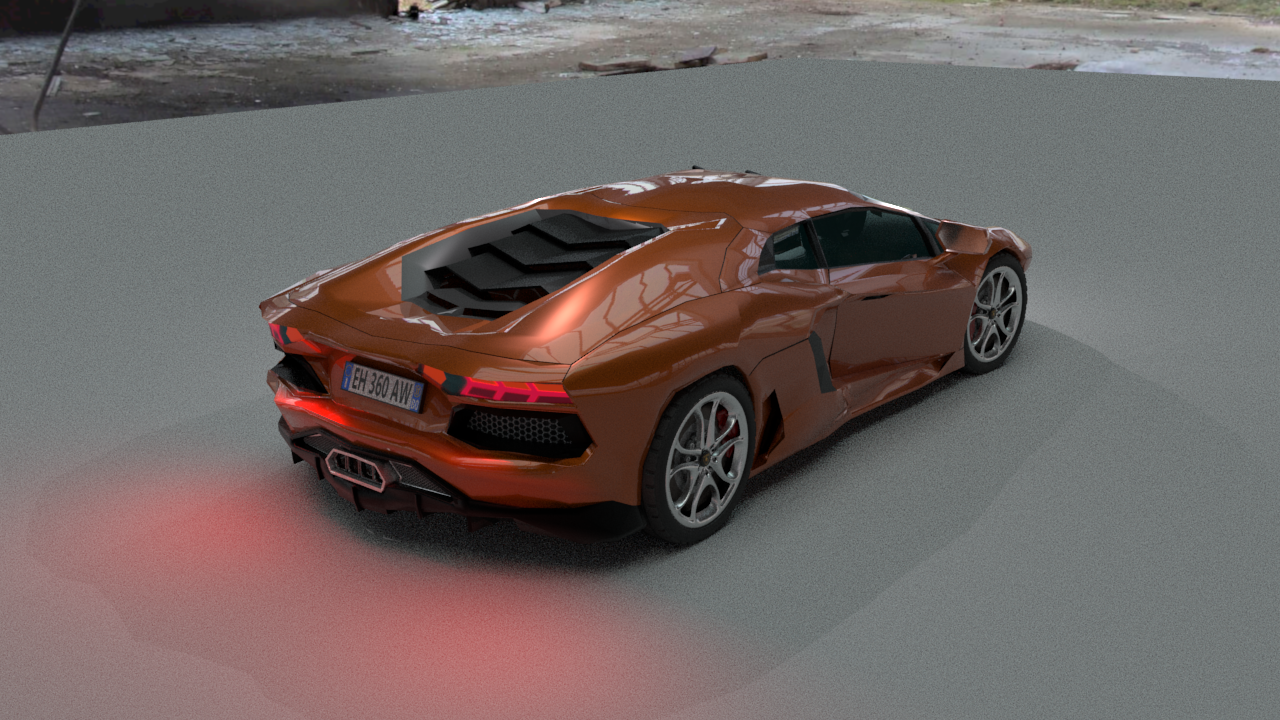
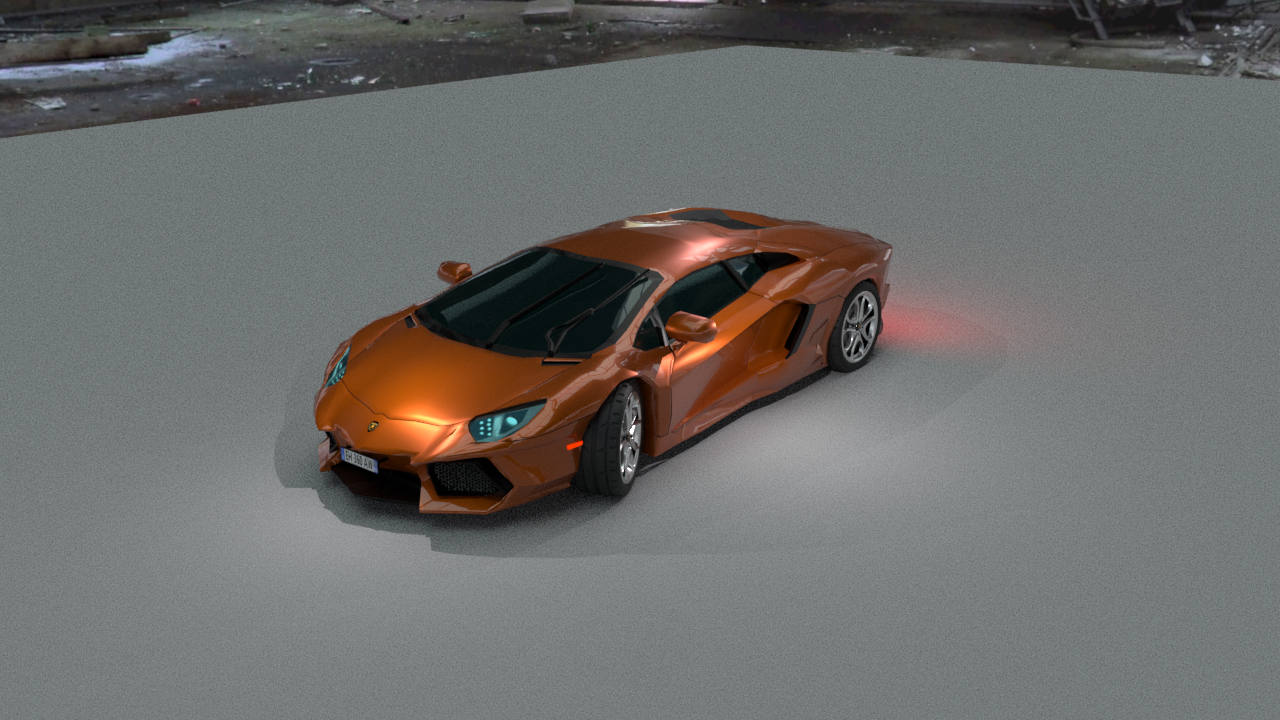
At the beginning of 2018, I tried to figure out something to create for my portfolio. The next step for me would be to create a car, since I had not previously tried it and I felt ready to attempt something more complicated. I have always loved Lamborghini and my favorite is the Aventador. It was not a difficult choice.
For an introduction of the Lamborghini Aventador, I would strongly recommend watching Top Gear’s review of it. This footage, along with some blueprints, has been a massive source of inspiration.
This project has challenged me in many ways, and taught me new essential workflows especially when creating cars. I would lie if I did not say that I made any mistakes along the way, but it was all worth it. Now, I want to finish up this project and continue making cars now that I know how to approach it. I realize I still have a long way to go, but this is better than what I have produced in the past. I will only continue to work harder on these kind of projects to become better. Most importantly, I had fun and it feels good to have found my way back to it.
I would also like to thank my friends Jonte Carrera and Jesper Eriksson for the helpful feedback I have received in order to improve my work.
Arnold Renderer
Most importantly, I had to learn more about the Arnold Renderer. I feel old, but I started out with Mental Ray. Arnold is now the default renderer in Maya. Solid Angle, the creator of Arnold, was acquired by Autodesk in 2016. Arnold is an optimized brute force algorithm (named after the bodybuilder Arnold Schwarzenegger). Global illumination is calculated on every pixel of the frame. Without sampling, it would be more expensive than sampling techniques such as final gathering or irradiance mapping.
The strengths of Arnold are:
Very fast photorealism.
Cross-application compatible.
Much faster than similiar renderers, such as Autodesk RayTracer or ART.
Arnold is an unbiased renderer, it’s more physically accurate. Mental Ray is a biased renderer.
Global and local control over sampling and ray depth, the number of bounces.
In short, greater realism with less effort. But as with all things, there are some limitations to consider:
Limited render to texture. Mental Ray is better here for content-creation for games, no seperate diffuse and specular pass.
No background rendering (batching) or render farms.
Transmissive and hard caustic (light focused by curved surface) is not possible. No photon mapping, no transmissive or refractive caustics.
Rendering
However, the car is not quite done yet. The rest of the week will be focused on fine-tuning the rendering settings to prepare for the final rendering. There has been a lot of tweaking as well with the mesh, as I suffered from some skewed faces that caused me to have weird reflections…some of them are still present but it is much better in comparison to only a few days ago. It is still a bit low poly in some areas as well, most notably around the wheels. The lighting model is not final, I just set up some quick point lights to give the car some highlights on top of the image based lighting.
I played around a bit with Bump Mapping and Displacement Mapping, just to showcase their differences. I went out on the world wide web and found a decent looking floor texture which I later on edited to feature a bit more detail. I finished off by creating a Bump Map which in this case could also be used as a Displacement Map due to the hard edges of the stone tiles.
This slideshow requires JavaScript.
Texture
Just a low poly plane with the edited texture applied to it. Nothing more goes on here, except a light source in the form of a spotlight from above.
Texture + Bump Map
The Bump Mapping adds subtle details to the floor by faking depth, since the black and white only instructs Maya of one thing: Up or Down? If we were to rotate this plane, it would still be flat like before. That’s because Bump Mapping only controls how the lighting is reflected on a surface and uses information in the Bump Map to tweak the already existing surface normals on the object. We are simply redirecting light rays, in short terms, to achieve the effect we want.
Texture + Displacement Map
Displacement Mapping, also known as Height Mapping for its use to create landscapes and create actual geometry at render time, gives a more realistic look on the tile floor and the light source in my scene is now casting real shadows. It takes a bit longer to render because of the added geometry, but it gives a much more realistic look compared to the Bump Map. If we were now to rotate this plane, it would no longer be flat and there would actually be a depth in between the stone tiles.
Today I decided to do something a little bit different, so I dug up some HDR images and played around with the reflective attributes of the mi_car_paint_phen_x material. I just took a plane and cut a sphere in half, attaching a surface shader to it with its Out Color linked to a HDR image of a window. Voila.
Amazing results for being such a quick setup, didn’t think it would turn out the way it did. Probably going to put out some documentation on this in the future, would be fun to play around a bit more with this material. Until next time, have a good one 🙂